Systems & Electronics
E84 Guitar Amplifier Circuit (WIP Modifications)
As the capstone project for Mudd’s core electrical engineering class, students can pursue a variety of circuit projects following a series of circuit analysis labs through which they apply concepts from the lectures. My peers Felipe and Lucas and I chose to create our own guitar amplifier circuit, capable of interfacing with and facilitating variable distortion and volume control for Lucas’ electric guitar.
I co-designed the circuit, primarily by selecting values for the resistors and capacitors after doing calculations for our desired gain ranges and cutoff frequency, based on what I learned in lecture. The circuit as shown below (KiCad schematic courtesy of Lucas), and our whole research, design, and testing process is explained in much greater depth in our team’s project report.


In future iterations, we would ideally add to the existing variable distortion and volume control to reflect real-world guitar amps. While it’s still a work in progress, on my own I’ve been working toward transferring the guitar amplifier circuit to something more permanent, and intend to add more variability, including to the filters themselves, via potentiometers. For example, one major addition will be a variable low-pass filter to control bass. It’s been fun to research circuit topologies online and see that selecting filters and such is as much an art as a science; I see now that you really have to play around with the circuit to get the sounds that you want.
E80 Circuit Design
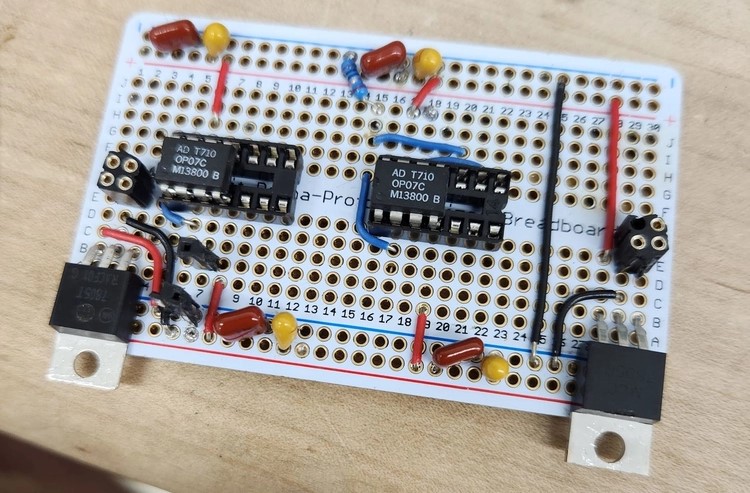
As a sophomore, E80 “Experimental Engineering” was advertised as being the class that would transform students into real engineers. Honestly, it did! As I worked with peers to modify an autonomous underwater vehicle (AUV) to collect environmental data, I was exposed to many facets of and design challenges in engineering, technical as well as logistical. I greatly enjoyed and learned so much by creating and debugging circuits to interface with and process signals from our AUV’s sensors.
Looking ahead to our deployment at Dana Point in Long Beach, California, my team chose to compare the measurement accuracy of a thermistor and a thermocouple, at depths determined via pressure sensor. I contributed primarily to the pressure sensor circuit design and the assembly of all of the circuits, but like all of my teammates performed tasks across everything from Arduino programming, to MATLAB data collection, to COMSOL computational fluid dynamics, to Excel data analysis.

E79 Systems Practicum
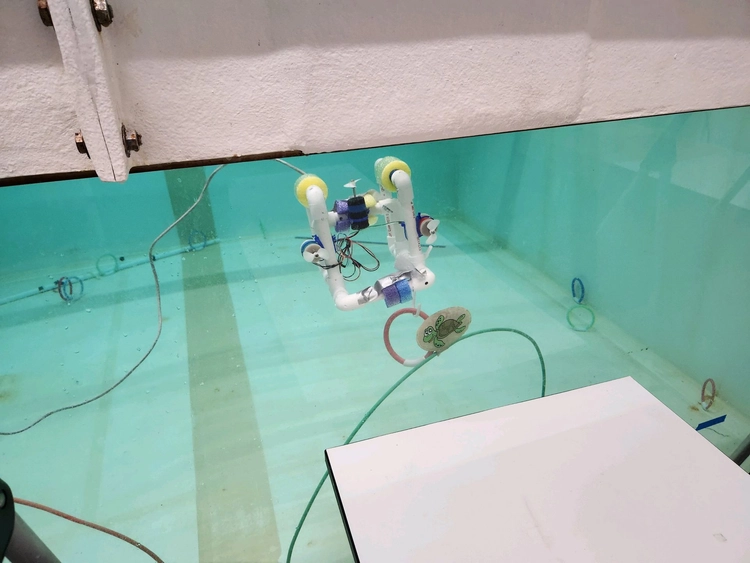
In E79, Harvey Mudd’s core engineering course, students apply the systems and analytics skills they learn in class to a semester-long robotics lab project, assembling a small proportional-controlled underwater robot and setting up its printed circuit board (PCB) to collect data. In the video, my lab partner Lucas and I are sending temperature, pressure, and motion information from a deployment at pHake Lake, an artificial lake just north of Harvey Mudd’s campus, to a LabVIEW setup offscreen.
Through this course, I learned about basic circuit design and filter topographies, got a refresher in Excel, and was exposed to LabVIEW, setting the foundation for other classes. While taking E79, I also became interested in electrical engineering, despite having always planned to pursue mechanical engineering. I greatly appreciate that Mudd provides robust coursework in both fields, which will only continue to help me be a versatile engineer. All-in-all, E79 was also just a fun learning experience! It was very rewarding to test our robot and successfully deploy it at pHake Lake, after a gradual process of assembling its components and testing its subsystems.